
 3604
3604
Create Requisitions from Smart Form
NOTE: below shows accessing the Multipurpose Creation from from FACILITIES category.
You can gain access from all PO category folder or directly from the Other folder.
North American users do not use Non Catalog Request as this is a manual process to create POs.
Use one of the form found in Shop by Category, if the PO category form is not available use the Multipurpose creation form.
-
On the Oracle Cloud homepage, Select Procurement.
-
Click Purchase Requisitions (New).

-
Select the Preferences tab.

-
Select the relevant BU from the Requisitioning BU dropdown menu, if needed.
-
Select Update.

-
Select Self-Service Procurement.

-
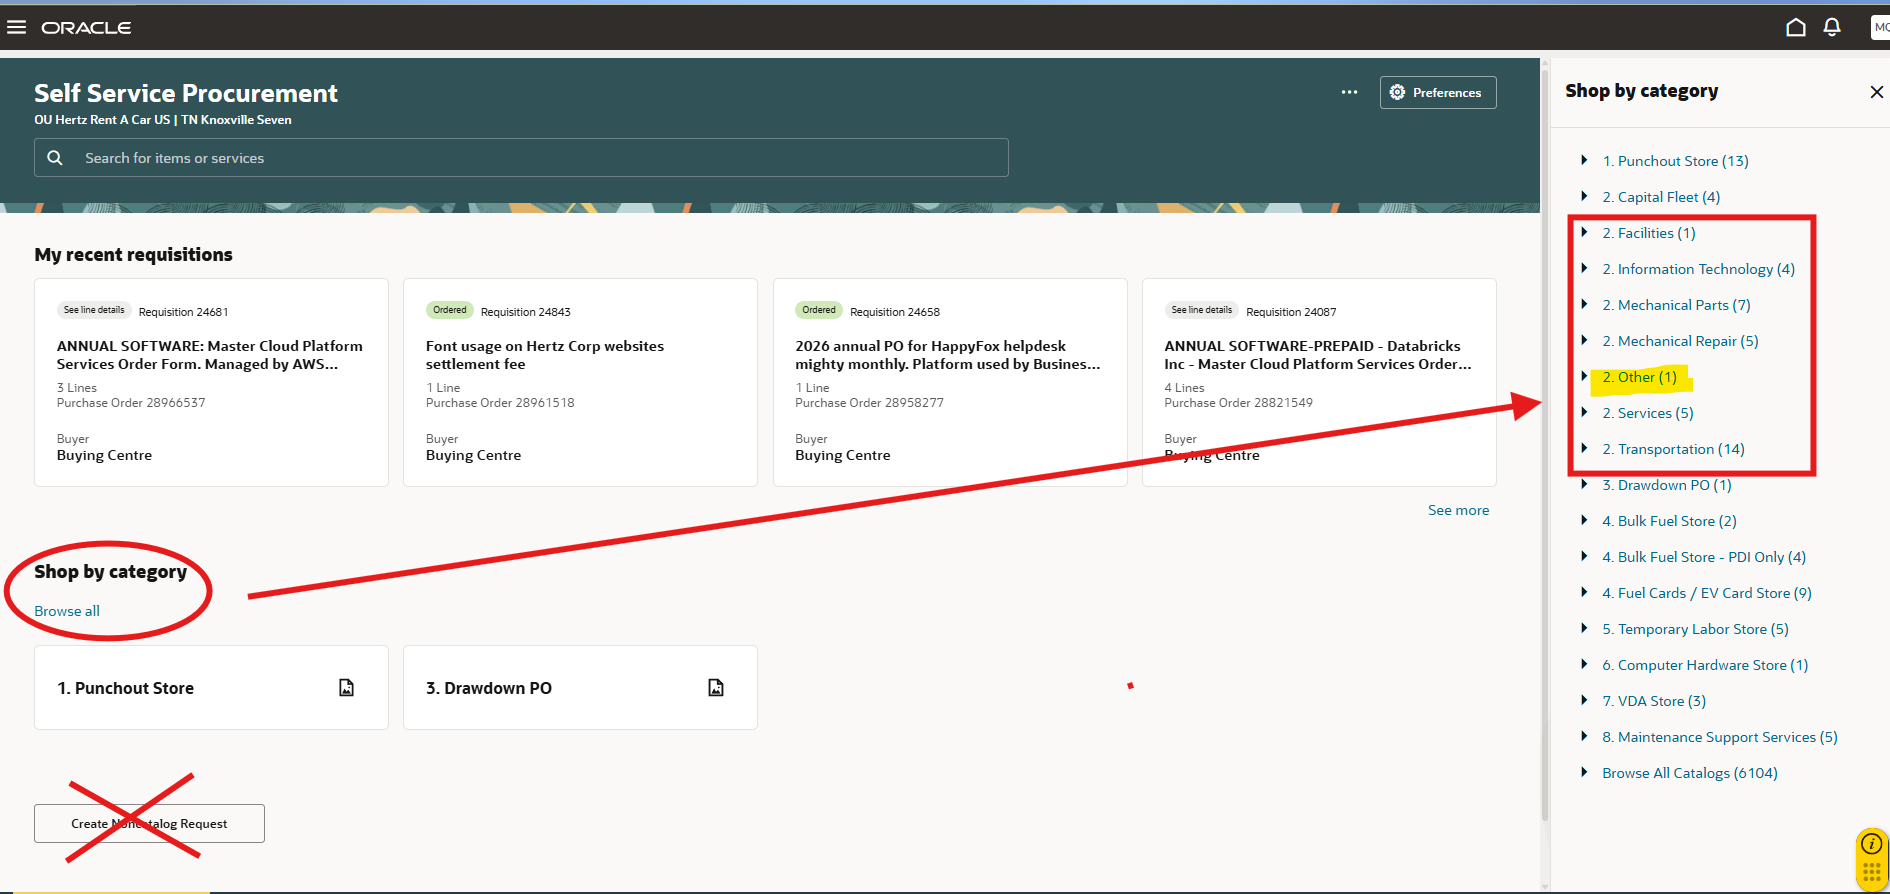
Select Shop by Category.
-
Select Browse All.

9. Smart Forms vary by business unit, they are denoted by the number 2, the request forms are preset with a specific PO category.
The item description, amount (expected monetary spend) and supplier, supplier site are all editable
The Smart Form located in the 'Other’ category is called a multipurpose creation form, this does not have specific PO category.
All fields are editable this form replaces the Non-Catalog requisition for North America.
For this example, Select Facilities.

-
Select the relevant form from the list.

-
When the Multipurpose creation form is used, you must enter the item description, select the category from the dropdown, enter the pricing, supplier, supplier site, if applicable add notes and attachments.
- Select Add to Cart.

A Confirmation message appears.
-
Select View Cart.

-
Select Edit icon (pencil).

-
Review or edit the details for each line.
-
Update the requester if ordering for someone else, always update the requested delivery date, when necessary, add notes and attachments for back up.
-
-
Select Update.

-
Select Submit.

This completes the process to Create Requisition from Smart Forms.
| See attachment to download a copy of this process via Word document. |


