 265
265
How to Edit a Rejected or Return Requisition
You may need to make a change or add an attachment after it has been rejected by an approver or returned by the Buying Center.
-
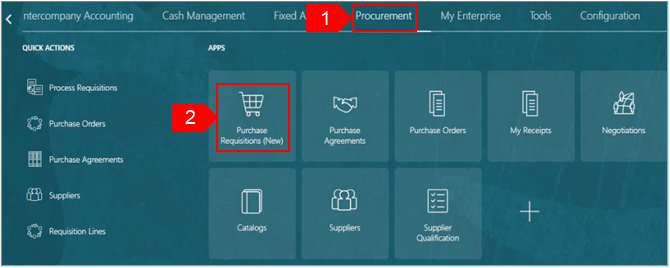
Select Procurement.
-
Select Purchase Requisitions (New) tab.
-
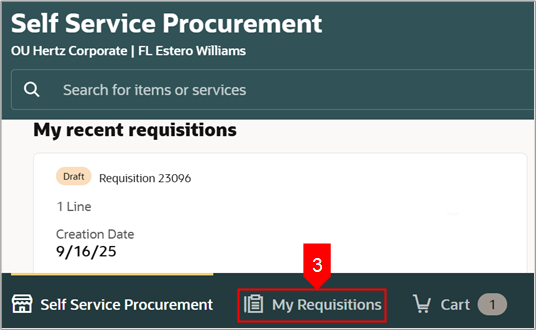
Select My Requisitions.
-
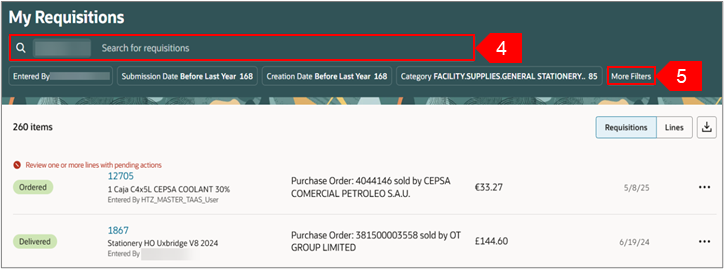
Search for the requisition in the Search bar.
OR
-
Use More filters to filter for a specific requisition.
-
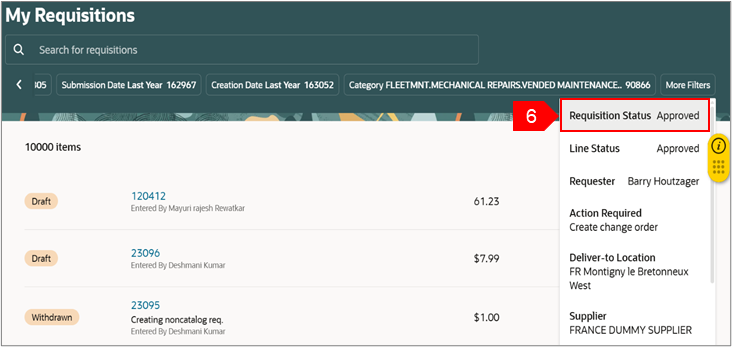
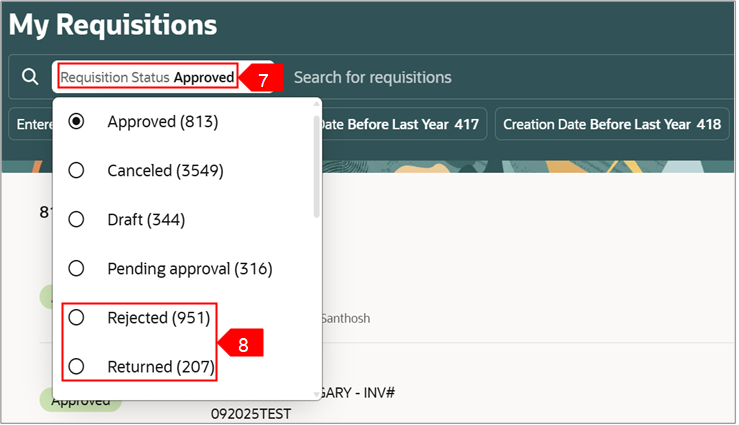
Select Requisition Status Approved from the list.
-
Select the chosen filter and a list appears.
-
Select Rejected or Returned.
Note: You can see Rejected or Returned label on the requisition shown in the red box below.
-
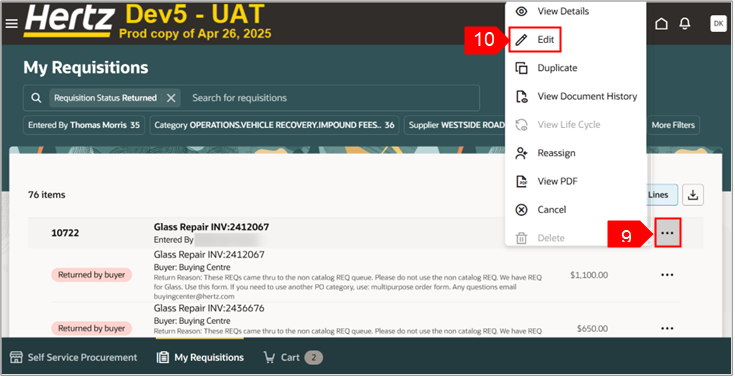
Select Ellipsis (three dots) against the chosen requisition.
-
Select Edit.
-
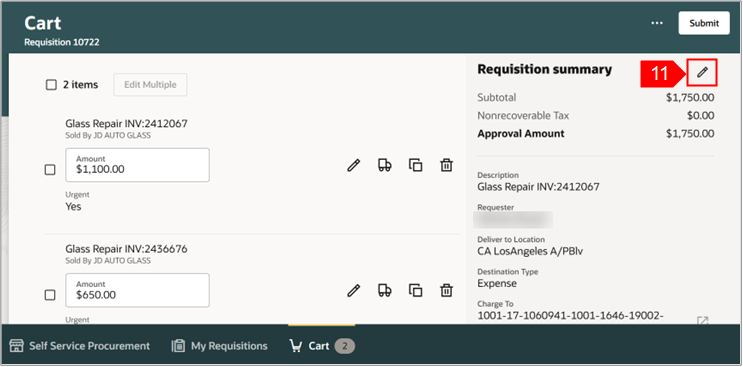
Select Edit icon (pencil) of Requisition summary to make changes at header level.
Note: You can also select the Edit icon (pencil) for each line to make changes for each line level.
-
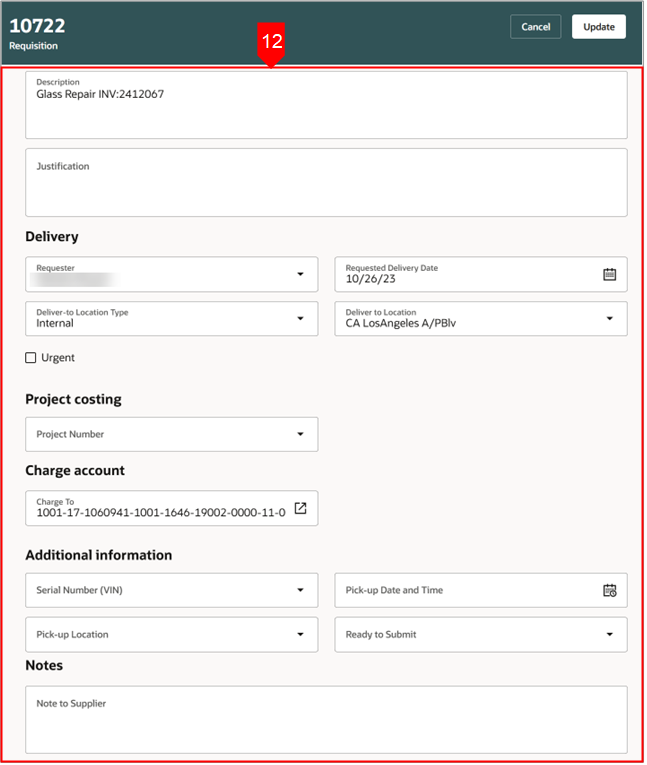
Review or edit the details for each line. Update the requester if ordering for someone else, always update the requested delivery date, when necessary, add notes and attachments for back up.
-
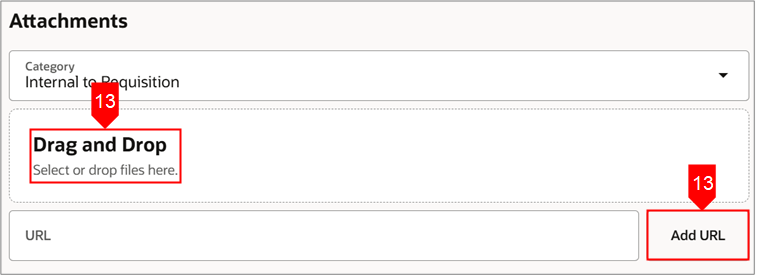
Add the attachment files using Drag and Drop or Add URL.
-
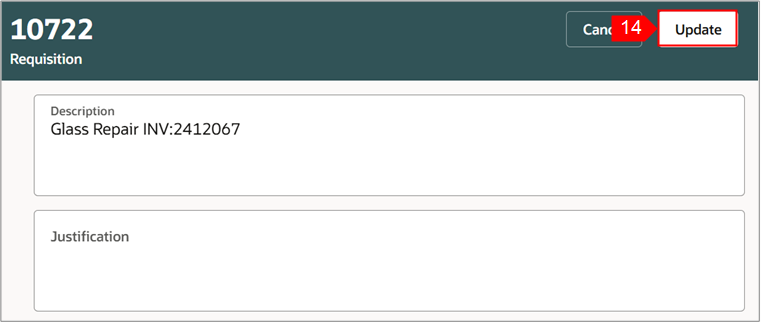
Select Update.
-
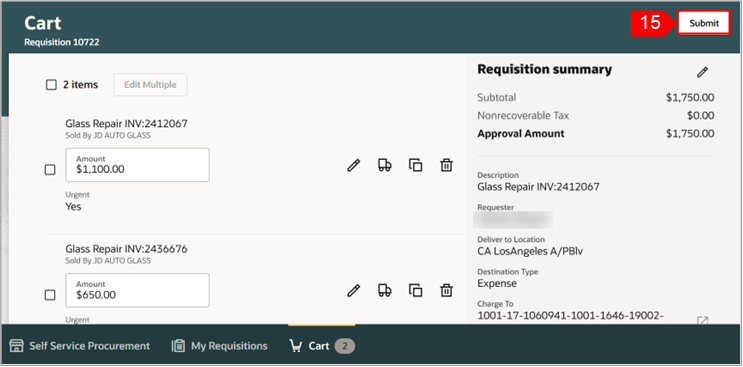
Select Submit.
-
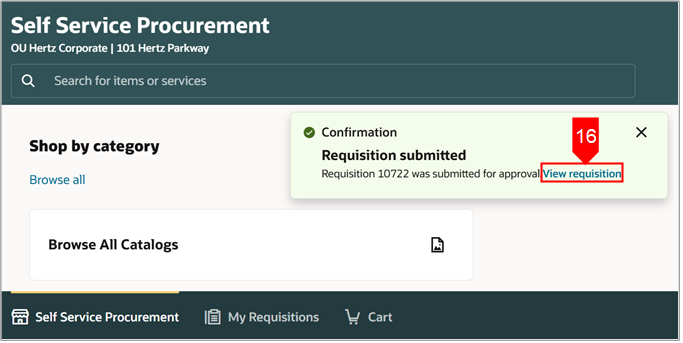
You can select View Requisition to view the requisition.
-
You can view the status of the requisition under My recent requisitions.
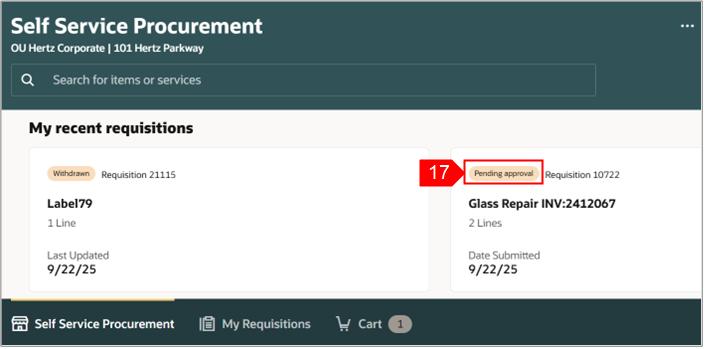
This completes the Edit a Rejected or Return Requisition process.
See below attached to obtain a copy of this how to guide.


