


Create a Local Catalog Based Requisition
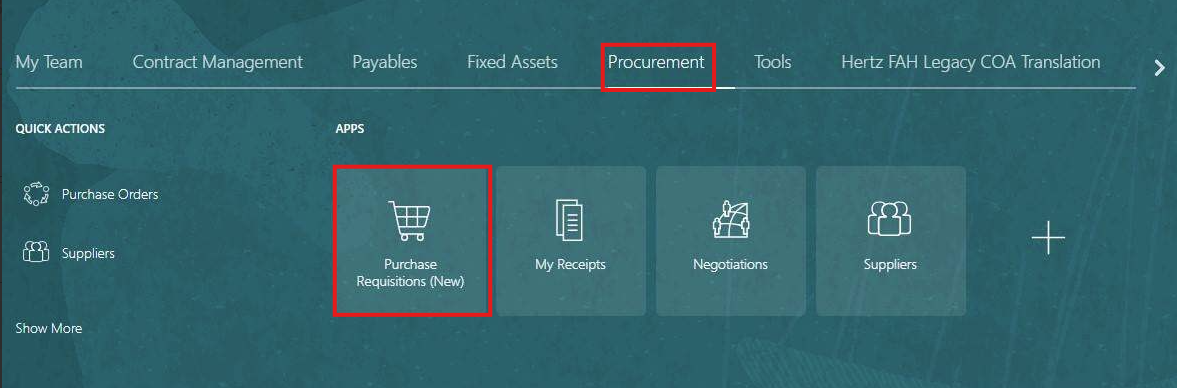
On the Oracle Cloud homepage, Select Procurement.Click Purchase Requisitions (New).
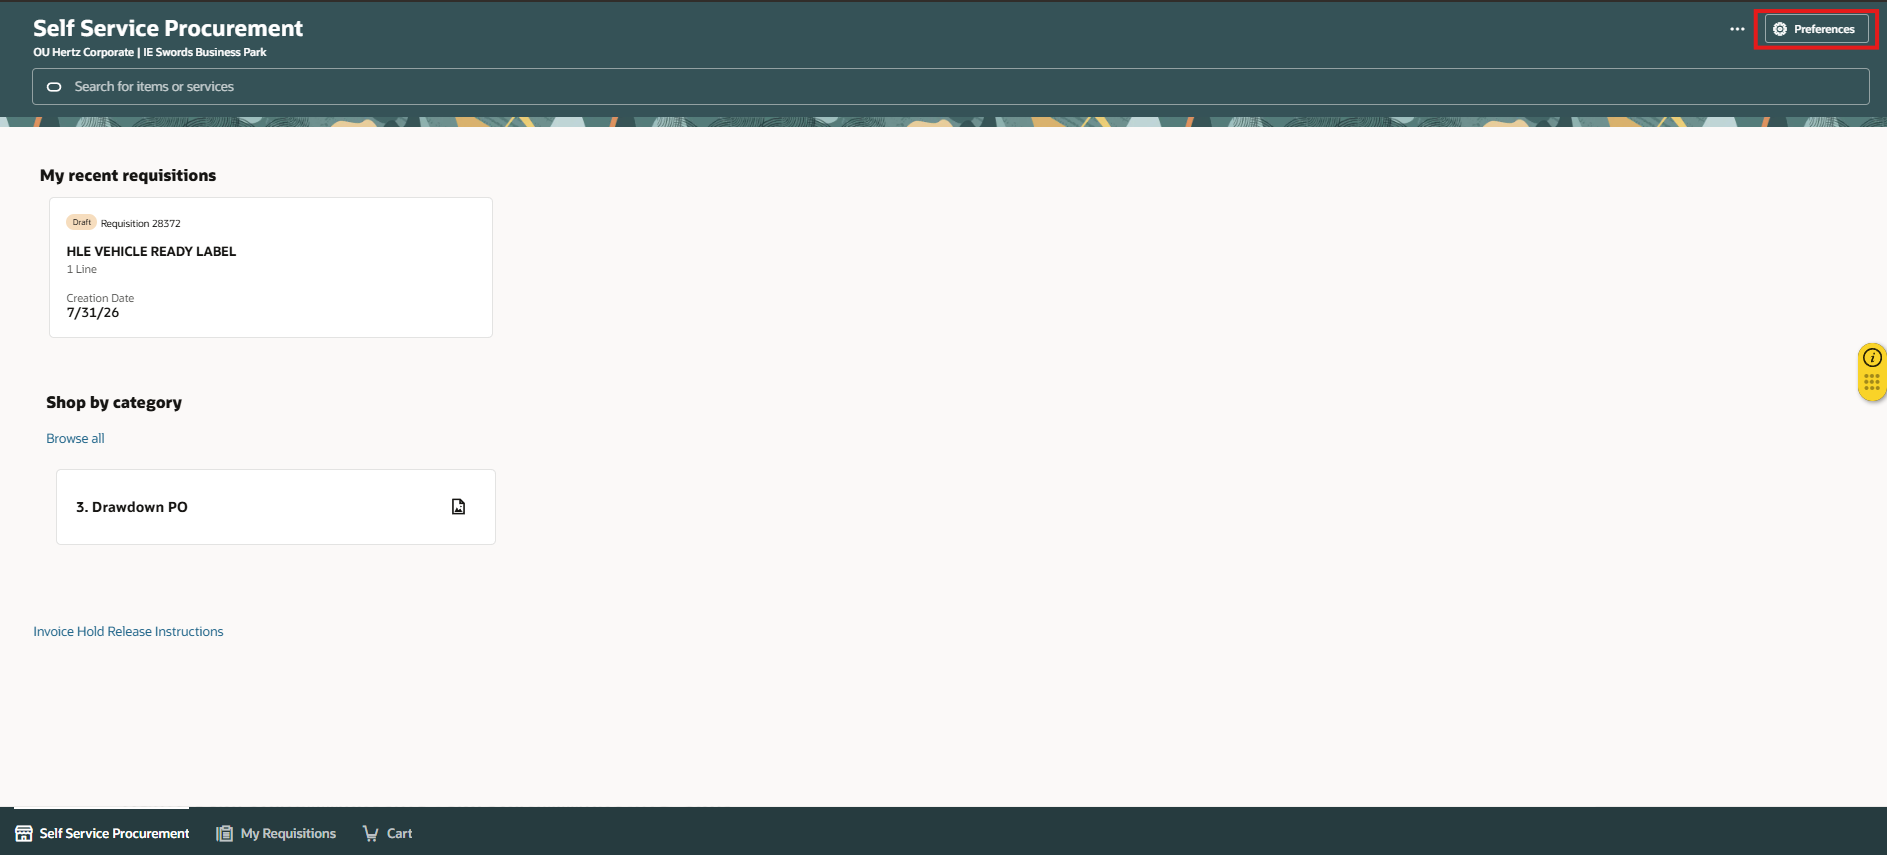
Select the Preferences, wheel icon on top right to confirm the business unit (BU).
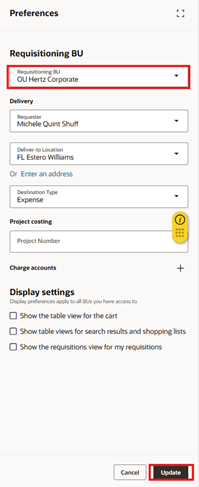
Verify the BU, if no change is needed, select cancel. To select a different BU, click on the Requisitioning BU dropdown menu.
Locate the required BU. Select Update.
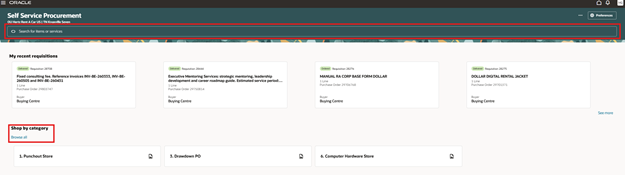
There are two options to search for a catalog. Enter the supplier’s name or item number, description in search bar or browse all.
Option 1: Select the name or item number from the search that is found or click enter

Card view: select add to cart or click on the card to view more information.
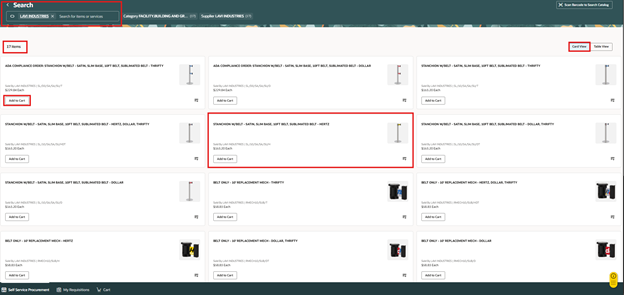
Table view: add quantity, add to cart or click on item description in blue to view more information.
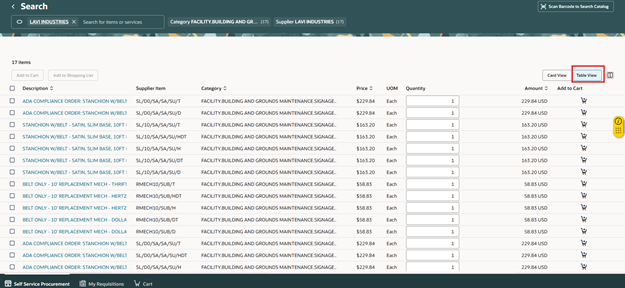
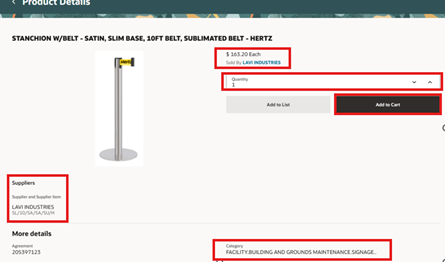
When you select the card or table view description, product details populate.
From this view you can add number of items and add to cart. Do not add to list as this feature is not enabled.
Option 2: Browse all
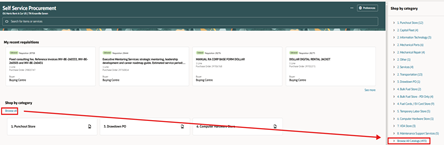
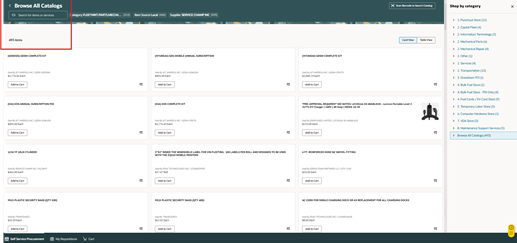
Within this BU – Corpoprate there are over 400 items, so the best approach is filter on an item #, description or supplier name.
Select the items and add them to cart.
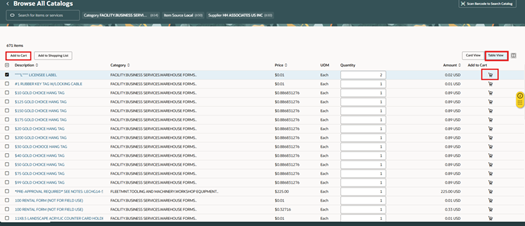
Select the items and add them to cart, note this is the table view.
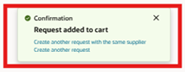
Pop up notice will appear, request was added to cart, at point you can select one of the options in blue or go to the cart and check out.
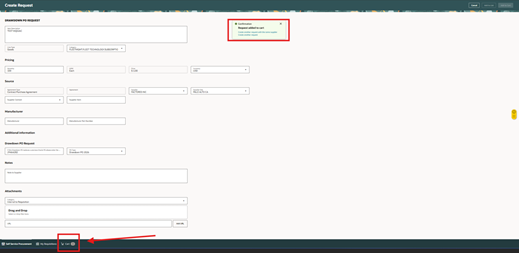
From this view, you can update the line quantity on this view.
Always add a description note. The description is important to add so when you search later it can be easily identified. Add justification to advise approver of details.
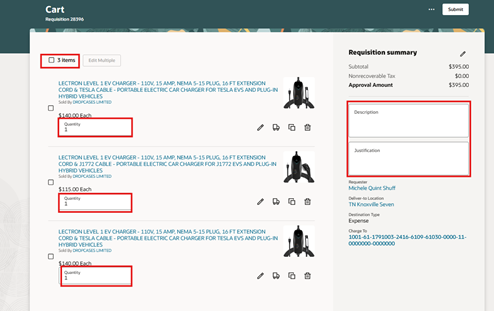
To edit multiple items, select the number of items (lines) to update
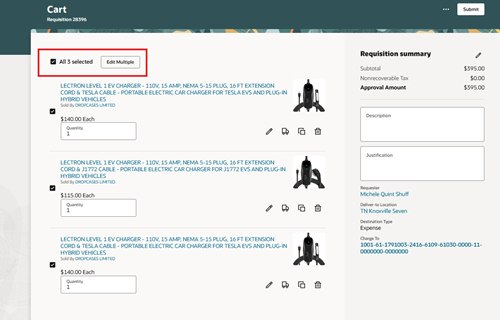
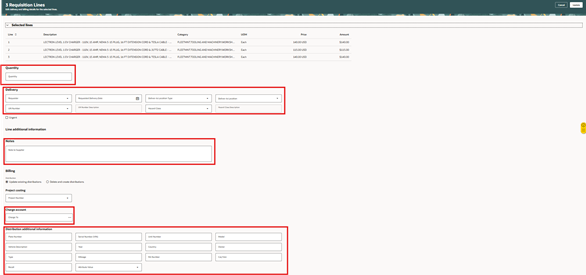
When each box is added it will apply the information to all lines.
Select submit to send the requisition to necessary approvers. For addition options prior to submittal select the 3 dots.
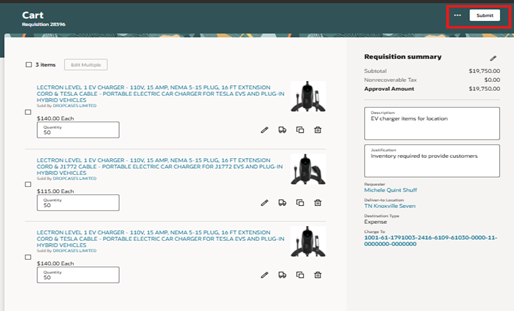
View the approvers, view REQ pdf or save for later (will leave REQ in draft until you submit for approval)
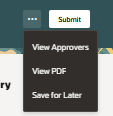
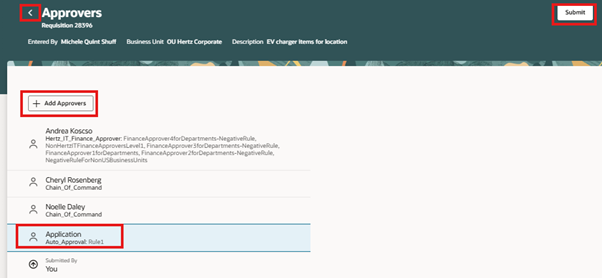
The requisition can be submitted from this view or use the back button to make additional changes or submit.
To add approvers, highlight an approver name or application, the add approvers box will be bolded, click to add approvers
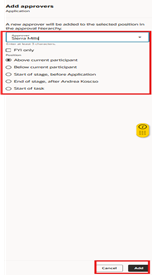
Add first name, last name or email in the approver box, adjust where the approver is reside based on the highlighted name select.
FYI – person gets a notification only; they do not approve. Select Add to proceed or cancel.
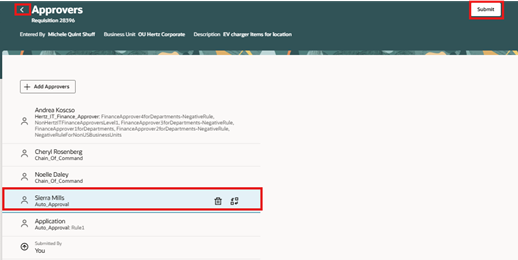
Submit or use back button
To ddit using the pencil icon:
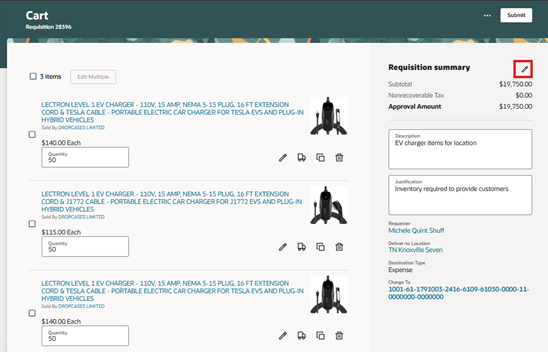
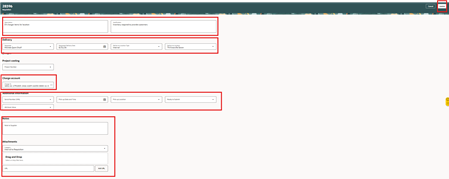
Enter the details in the relevant fields. Confirm the requester name, deliver to location: note country must match business unit (BU) or PO will fail.
Example, OU Hertz UK Hel is BU, you must use a UK deliver to address. Update the default requested delivery date to a known or estimated delivery date.
If there are multiple lines, use the multiple line update check box or individually review each line. Select Update.
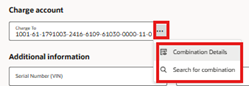
Note: 3 dots on right of charge account will show details. Using the search combination is not recommended.
To update see below.
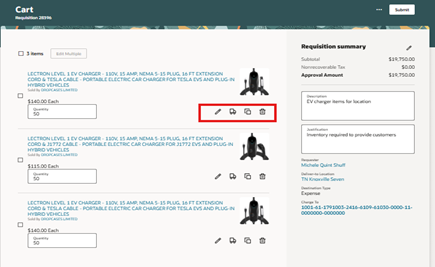
Additional edit methods, go to the line(s) select pencil, to update item, price and quantity. Select truck for requester, deliver to location and charge account.
The double box is duplicate, easily adds a line or trash will delete the line.
When pencil icon is select, there are two tabs at the top and when more than one line, the additional lines are at the top right, so you edit everything from this view.
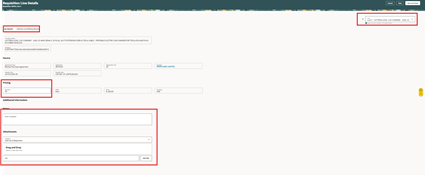
To edit the charge account, go to the 3 dots next to the charge account on the right side of the page.
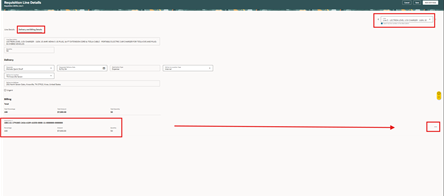
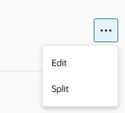
Select edit to adjust the location and department number. Split is used to use more than one charge account.
The easiest method is to copy and paste in the location or department or back space and enter in the number.
Select update
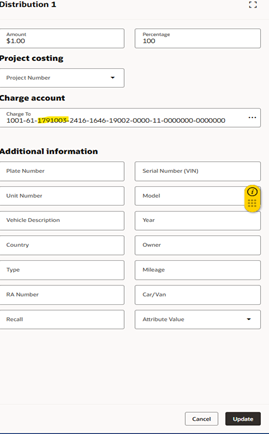
Note these two segments are the natural and sub accounts. Never manually update as these two number are tied to the PO category.
This catalog requisition does not allow users to update the PO category.

Once all updates are made select submit.

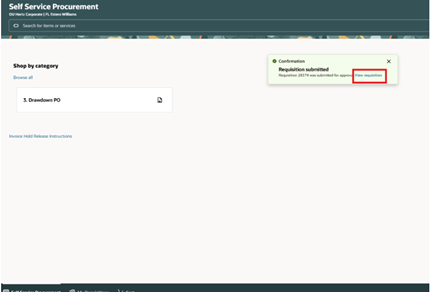
Pop up will show requisition number.
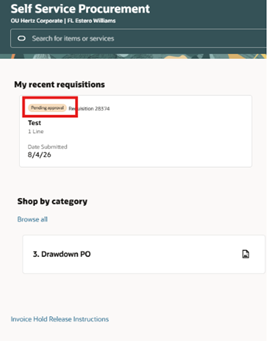
The main page will have the most recent requisitions and status.
This completes the Create a Local Catalog Based Requisition process.


