


Purchase Order Available Change Options
Create and edit a PO, with a pending change order.
Locate the PO, select the ellipsis (3 dots) select edit or view details from the menu.
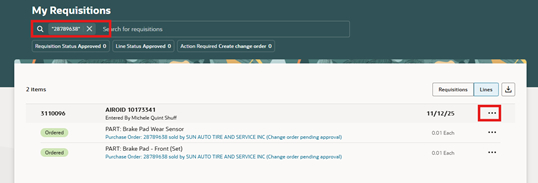
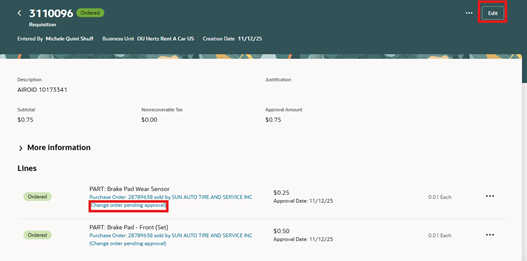
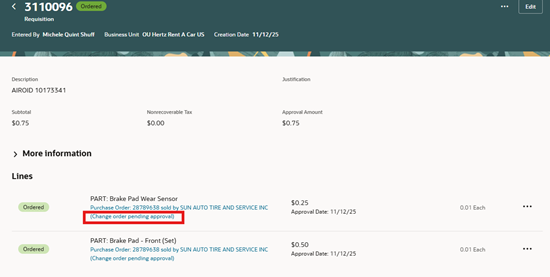
This example shows a PO pending a change order
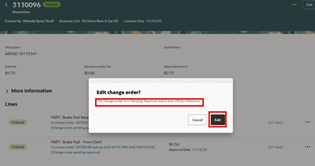
Pop up notices: you are about to withdraw change order pending approval.
Selected edit to proceed,
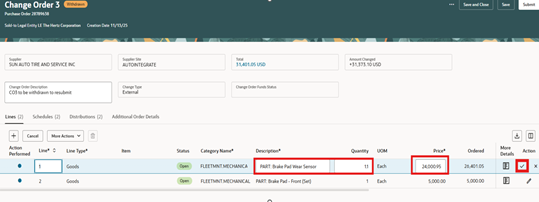
Select the pencil icon to edit every line and/ or sub tab: Schedules and Distributions.
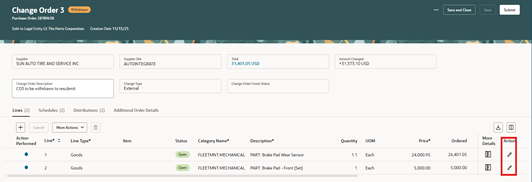
Once the pencil icon is selected for the line, available boxes to make changes will show editable selections.
Click the check mark when done, save submit.
Select the plus + sign to add a line. This option is useful when PO category change is needed.
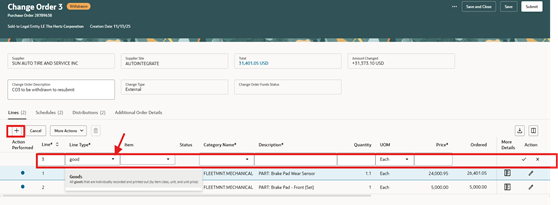
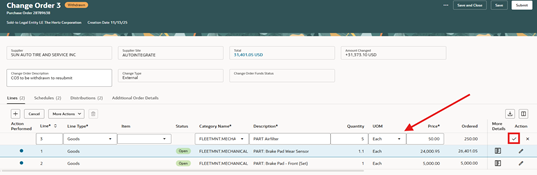
Complete the mandatory fields, select the check mark. Or if you click elsewhere on the page this activates the check mark.
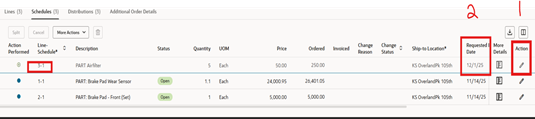
To update requester name, requested delivery date or charge accounts, use the schedule or distribution tabs.
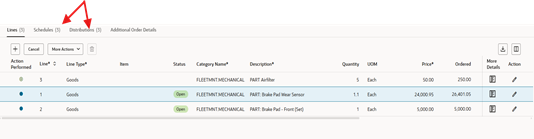
Select the tab e.g. Schedule, click on the pencil, add the requested delivery date.
NOTE: an open box does not appear, this section is grey, but you can update it.
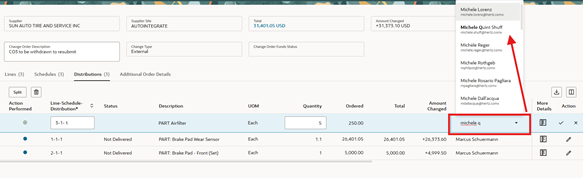
Select the tab: e.g. Distributions, click on the pencil icon, update the requester name.
NOTE: this section is grey but does have a menu arrow.
Type in part of the first last name and select.

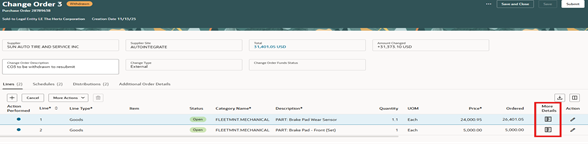
Select More Details to add supplier notes and attachments
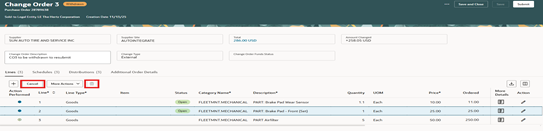
Additional functions are available for the line. Hi-lite the line, if icon is greyed out, the selection is not available.
Cancel is not available for line 3, but delete (trash can) is available, as this is a new line
.
Cancel is available for line #2 but delete (trash can) is not.
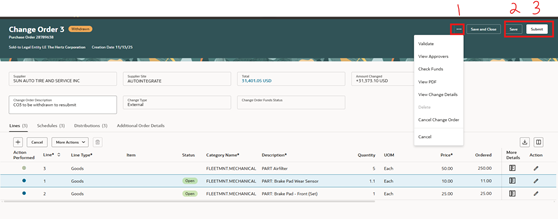
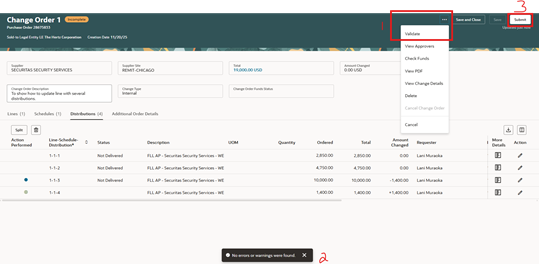
When finalizing the change, use the ellipsis (3 dots) to view menu choices.
Validate will check the changes to confirm if errors are present.
View approvers to check the approvals required.
View change details to look updates, cancel change order.
Cancel would cancel the PO. NOTE: if receipts or invoices are applied this not allowed.
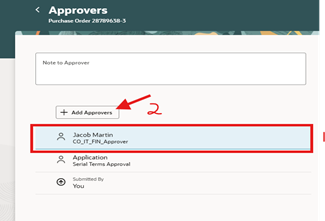
Approvers view. Add approver is available as with a new requisition.
Approver name must be hi-lited, select add approver
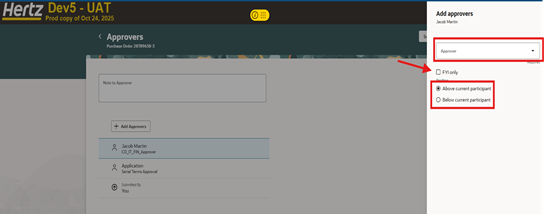
Add approver first last name, select where to place their name, check box FYI for notifications.
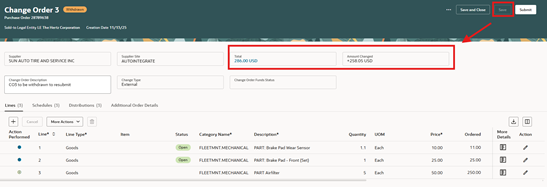
Once you select SAVE, the change amounts will be visible
Once submitted the order will show pending approval
Editing a PO with multiple distributions
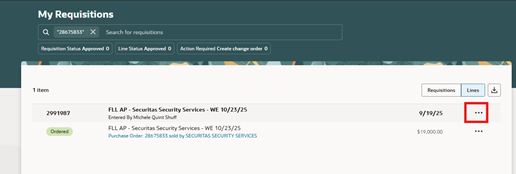
Select ellipsis, select edit or if you recently reassigned select view details.
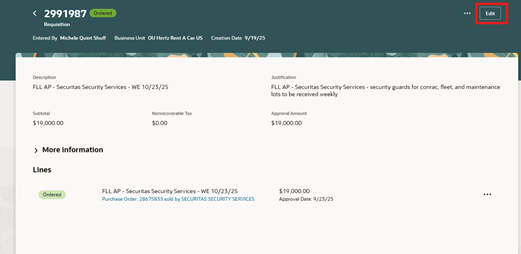
Select Edit from this view.
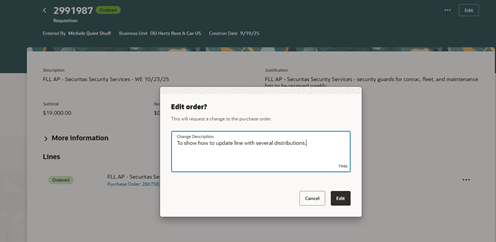
Enter the change reason, select Edit.
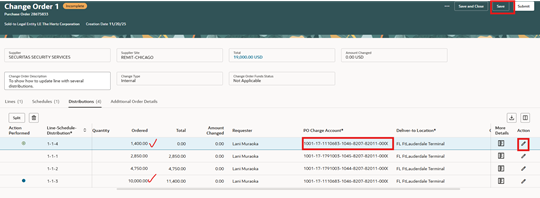
Go to the distribution tab, select pencil icon for the line to update
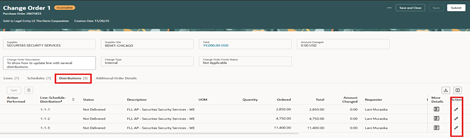
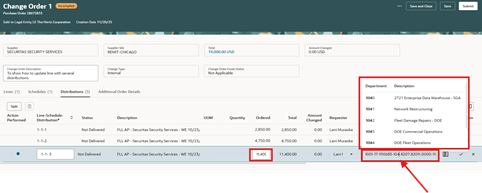
You can edit the amount (quantity or ordered) depending on type.
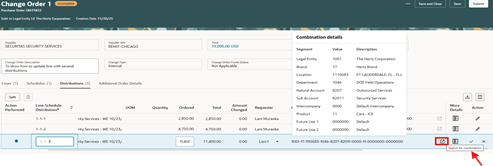
To edit the charge account segments, add you cursor into the segment to update.
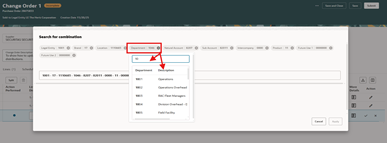
In this example, updating the department, when part of the 4 digits is removed, a pop up will show available departments based on the selection.
Or you can use search for combinations
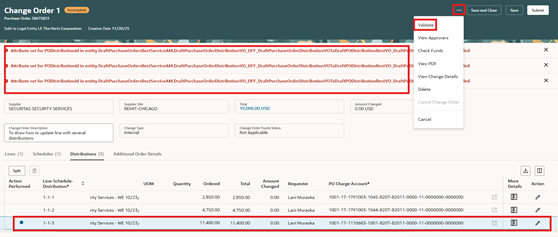
When you select save or validate, if the account segment is not approved or if invoices are applied, an error automatically populates.
If you verified no invoices are applied, check the account segment and make the correction, save, validate and submit.
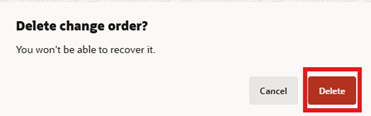
If you cannot find there is an invoice or the account segment is invalid, go to the three dots, select Delete, this will remove the incomplete change order.
Review the pop-up note and confirm it is deleting the change order.
Split is available to add additional charge accounts.
Edit line to split.
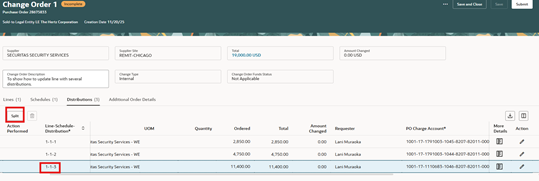
Add the amount to split from distribution 3, go to the charge account segment and update.
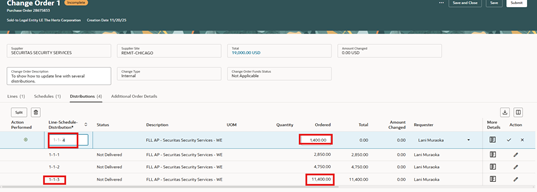
After updating the new distribution line # 4, go back to #3 to lower the amount.
Select Save.
From the 3 dots, select validate, if no errors, select Submit
.
Attached is a copy of this guide in Word format to download


