


Create Requisitions from Smart Form: Multipurpose Requisition Creation form
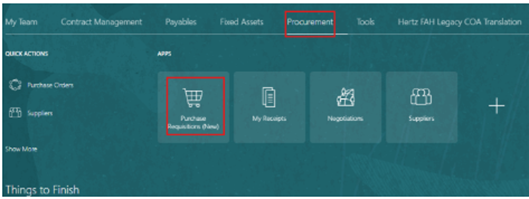
On the Oracle Cloud homepage, Select Procurement.
Click Purchase Requisitions (New)
Select the Preferences tab.

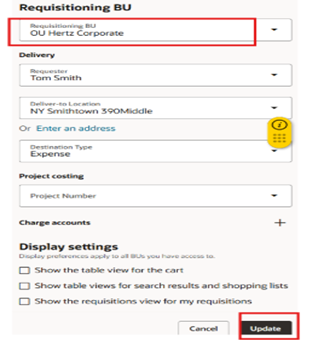
Select the relevant BU from the Requisitioning BU dropdown menu, if needed.
Select Update.
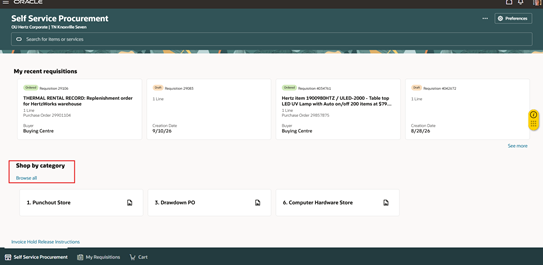
Select Shop by Category, Select Browse All.
To use the Multipurpose Creation form, select ‘Other’ category.
NOTE: In every BU this is the same category for all.
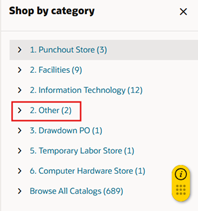
In Corporate BU the form must be selected, in all other BUs the requisition form will open directly.
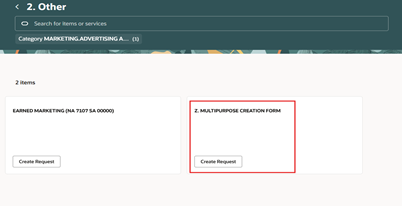
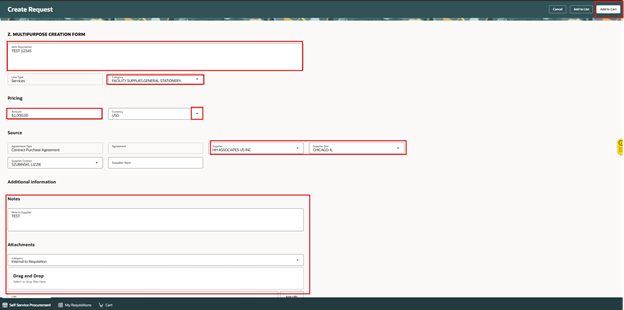
When the Multipurpose creation form is used, you must enter the item description,
select the category from the dropdown, enter the amount, currency (can be updated to align to supplier site currency),
supplier, supplier site, if applicable add notes and attachments.
Select Add to Cart
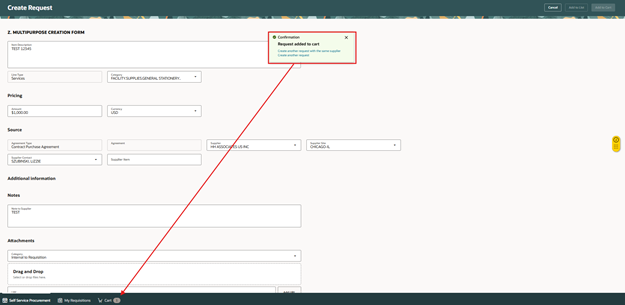
A Confirmation message appears. Go to the footer and select View Cart to continue with requisition.
In the cart, add the description, this is vital information as you will see it in your My Requestions view.
Add details in justification box for approvers to review.
If only one line, select the pencil icon at requisition summary. This function will update all the lines.
If multiple lines and you want varied information, you can edit line by line or select the edit multiple lines box to select which to update.
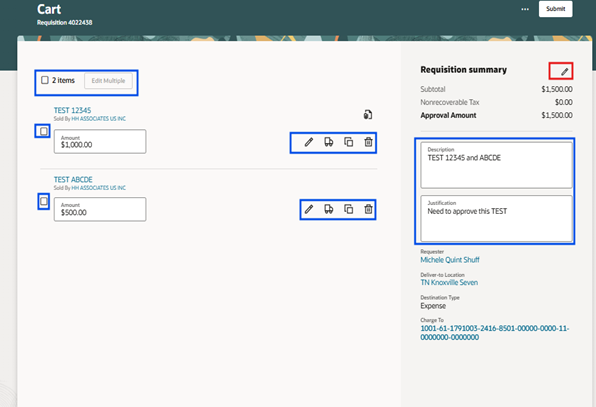
View from Requisition Summary Edit (pencil).
When ordering for other people update requester name, this is how the approvers and location / department are derived.
If you need to order for a requester who location is not within the requisition BU, you must update the deliver to location to align with the requisition BU.
Example: Sally Smith’s location is in Dublin Ireland but you are creating the requisition in BU = Hertz Rent A Car Canada, you must update the deliver to location to a Canada address.
If you do not make this update, when the PO is created it will be stuck as incomplete.
You will see the REQ as approved, but no PO will show in REQ view in MY Requisitions, when this happens contact your local Buying Center for assistance.
Always update requested delivery date to expected date, the PO required date is used to determine if it should remain open or be closed.
The charge account field is editable, in this view, place your cursor in the charge to box make the changes directly within the box. We do not recommend using the 3 dots.
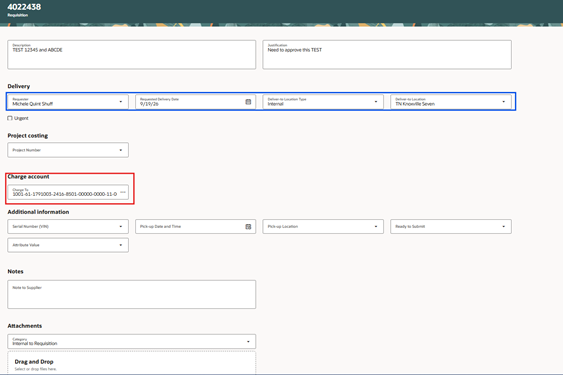

NOTE: never update the natural (NA) and sub account (SA), these accounts are tied to the PO category.
If you need charge between several natural sub account, add a line using the designated PO category.
For a list of PO categories go to Global Procure to Pay look under frequently request list, PO category listing.
PO category FACILITY BUSINESS SERVICES WAREHOUSEING FORMS = Natural 8501 and Sub 00000

Example of what each account number segment means.
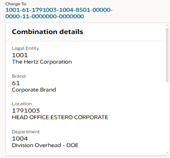
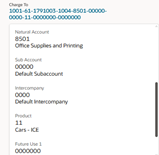
When more than one account number is needed, you can create a single line and apply various charge accounts.
Select the truck icon
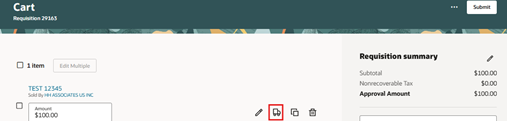
Select the ellipsis (3 dots at the far right of the charge account, select split
.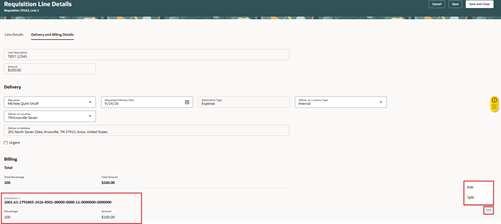
Enter a fixed amount or a percentage, edit the charge account segment by placing the curser directly into the charge account, back space, enter the number or select.
Confirm the account, select Create.
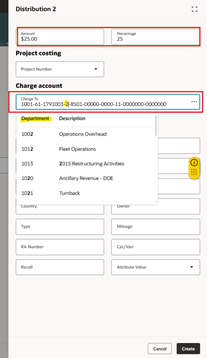
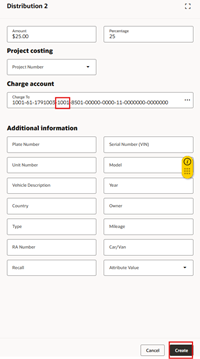
To add additional charge accounts, split the original amount.
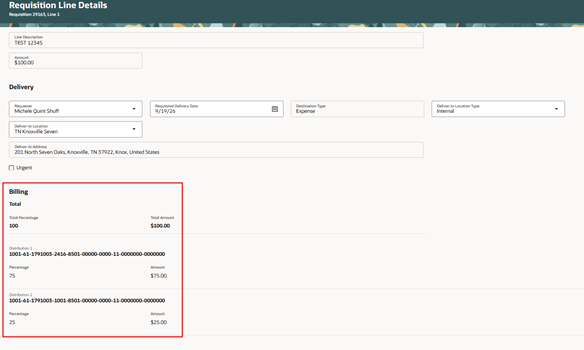
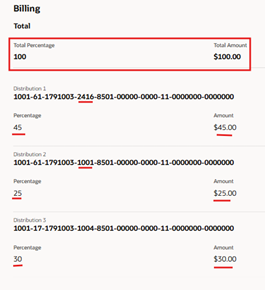
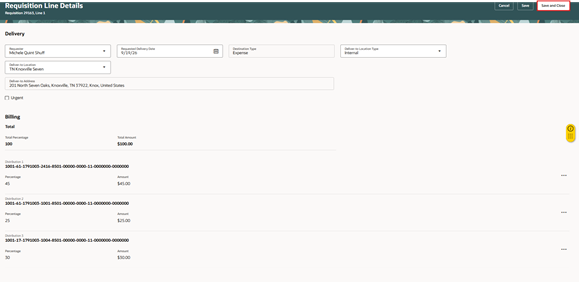
View of the final split, check the updated charge account and amounts.
The total must equal 100 percent and requested requisition amount
Select Save and Close to return to the main requisition screen to finalize, check approvers and/or submit.
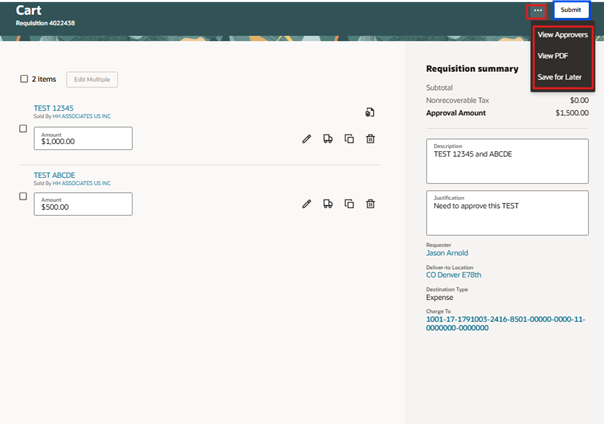
To view the approvers, select the ellipsis (3 dots) and/or select submit to complete the requisition.
This completes the process to Create Requisition from Smart Form: Multipurpose Creation Form.
See attached word document to download and save for easy access.


